


A sewing line can use the correct machine, thread and fabric and still produce an unsatisfactory seam if stitch density is not controlled. A seam that looks too open may fail during use, while an excessively dense stitch line can damage delicate fabric or create an uncomfortable, rigid seam.
One of the basic measurements used in garment sewing is Stitches Per Inch (SPI). It helps the production and quality teams confirm whether the stitch spacing matches the approved sample and technical specification.
What Is SPI in Garment Manufacturing?
SPI means Stitches Per Inch. It indicates the number of stitch intervals formed along one inch of a sewn seam.
In a regular single-needle stitch line, SPI is closely related to stitch length. A higher SPI means the stitches are closer together, while a lower SPI means the spacing is wider.
SPI should not be treated as a universal quality score. The required value depends on the fabric, stitch type, seam construction, thread, garment function and buyer specification.
SPI Formula
SPI = Number of stitch intervals ÷ Seam length in inches
If the seam length is measured in millimetres:
SPI = (Number of stitch intervals × 25.4) ÷ Seam length in millimetres
For a regular single row of stitches, the approximate stitch length can also be calculated as:
Stitch length (mm) = 25.4 ÷ SPI
This relationship is a practical approximation for evenly spaced single-row needle penetrations. For complex multi-needle or multi-thread stitch formations, follow the approved inspection method for that construction.
Practical SPI Measurement Example
Suppose a quality inspector measures a seam over a length of 2 inches. There are 19 needle penetration points, including the first and last points.
The number of stitch intervals is 18 because the two end points create 18 spaces between them.
SPI = 18 ÷ 2
SPI = 9
The seam therefore has 9 stitch intervals per inch.
How to Measure SPI on the Sewing Floor
Step 1: Select the correct seam
Choose the seam mentioned in the buyer's specification or inspection checklist. Do not measure a decorative topstitch when the requirement is for the main construction seam.
Step 2: Keep the fabric relaxed
Place the garment or fabric sample on a flat surface. Do not stretch a knit seam while measuring it, because stretching changes the apparent spacing.
Step 3: Align the measuring scale
Use a transparent SPI gauge or a ruler with a clear inch or millimetre scale. Align it with the direction of the stitch row.
Step 4: Count stitch intervals
Count the spaces between successive needle penetrations. If you count both the first and last penetration points, remember that the number of intervals is one less than the number of points.
Step 5: Check more than one location
Measure different sections of the same seam. A line may have the correct average SPI but still contain inconsistent spacing caused by feeding, operator handling or machine adjustment.
How SPI Affects Seam Quality
Low stitch density
If the stitch spacing is wider than the approved specification, the seam may show gaps or reduced seam security. Depending on the fabric and construction, it may also contribute to seam opening, thread exposure or poor appearance.
Excessive stitch density
Too many needle penetrations can create a perforated line, especially on delicate or lightweight fabrics. This can contribute to fabric damage, puckering or reduced seam flexibility.
Uneven stitch density
Uneven spacing may indicate inconsistent fabric feeding, incorrect pressure, operator handling problems or unstable machine settings. The inspector should check the machine condition and seam construction rather than simply accepting the average SPI.
SPI Must Be Selected Alongside Stitch and Seam Type
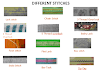
Stitch density cannot be selected independently of stitch formation. A lockstitch, chain stitch, overedge stitch and cover stitch behave differently because their thread arrangements and seam structures are different.
Before changing SPI, review the stitch class and seam construction. The Textile Mates guide to different stitch types and classifications explains the basic stitch classes and their applications.
The Textile Mates Calculator Hub also includes a Sewing Thread Consumption Calculator. This is useful when reviewing how a change in stitch density may affect the thread requirement, although actual thread consumption still depends on stitch type, seam thickness, thread path and machine settings.
Fabric construction matters as well. A stretch knit and a tightly woven fabric do not respond in the same way to the same stitch setting. The fabric types and properties guide can help readers understand why material characteristics should be considered before approving a seam specification.
SPI Quality Control Checklist
- Check the buyer's approved SPI requirement before bulk sewing.
- Use the correct seam and stitch type for measurement.
- Measure the seam without stretching the fabric.
- Count stitch intervals consistently.
- Check multiple locations instead of relying on one reading.
- Compare the result with the approved tolerance.
- Inspect puckering, skipped stitches, thread breakage and fabric damage.
- Record the operation, machine, sample location and measured value.
There is no single SPI tolerance that should be applied to every buyer and garment. Use the approved tech pack, sample and inspection standard for the order.
Common SPI Measurement Mistakes
- Counting penetration points instead of stitch intervals.
- Stretching knit fabric while measuring.
- Measuring the wrong stitch row.
- Assuming every seam needs the same SPI.
- Changing SPI without checking seam elasticity and appearance.
- Using a generic tolerance instead of the buyer's approved requirement.
Frequently Asked Questions
What does 10 SPI mean?
It means there are 10 stitch intervals in one inch of seam length. For a regular single-row stitch, the approximate spacing is 2.54 mm.
Is higher SPI always better?
No. Higher SPI can increase stitch density, but excessive needle penetrations may weaken some fabrics or create puckering. The correct value depends on the material and seam function.
How do I convert SPI into stitch length?
For a regular single-row stitch, divide 25.4 by the SPI value to estimate stitch length in millimetres. For example, 10 SPI is approximately 2.54 mm.
Does SPI affect sewing thread consumption?
Yes, it can. More stitches along the same seam generally require more thread, but the final consumption also depends on stitch formation, thread path, seam thickness and tension.
Which standard covers stitch and seam construction?
ASTM D6193 covers the requirements and characteristics of stitches and seams used in sewn products. It discusses factors such as fabric, seam type, stitch type, stitch density, thread tension and thread strength.
Conclusion
SPI is a simple measurement, but it has an important role in garment sewing quality. Correct measurement, consistent machine settings and reference to the approved specification help prevent seam problems before they become bulk production defects.
Instead of selecting stitch density by habit, evaluate it together with the fabric, seam type, stitch formation, thread and garment end use.



 in Garment Sewing: How to Measure, Set and Control)
0 Comments